


Features
Legal Roadmap: Canadians Working Down Under in Australia

Australia’s sun-kissed shores, vibrant cities, and dynamic job market attract many Canadians looking to expand their horizons. The allure of working Down Under is strong, but before you can exchange the chilly Canadian winters for Australia’s summer beaches, there’s a significant legal pathway to navigate. This post will guide you through the necessary steps to ensure that your Australian work experience is both enjoyable and compliant with local laws. One essential element is securing an Australian visa for Canadians, but there’s much more to consider. Let’s dive in.
Understanding Australian Work Visas for Canadians
The first port of call for any Canadian looking to work in Australia is to secure the correct visa. The Australian visa for Canadians is not a one-size-fits-all; there are several options depending on the nature and duration of your stay.
Working Holiday Visa (Subclass 417)
Many young Canadians (18 to 30 years old, with a recent extension to 35 for some applicants) choose the Working Holiday visa. This visa allows you to work and travel in Australia for up to 12 months, with the possibility of extending it for a second or third year if certain conditions are met, such as undertaking regional work.
Temporary Skill Shortage Visa (Subclass 482)
If you have skills in particular occupations that are in demand, you might qualify for the Temporary Skill Shortage visa. This requires sponsorship from an approved Australian employer and has both short-term and medium-term streams.
Employer Nomination Scheme (Subclass 186)
For Canadians with significant work experience who are being offered a permanent role in Australia, the Employer Nomination Scheme visa may be suitable. It allows you to work in Australia permanently, and your occupation must be on the relevant list of eligible skilled occupations.
Skilled Independent Visa (Subclass 189)
This visa is for invited workers and New Zealand citizens with skills Australia needs. For Canadians, it means you’re not sponsored by an employer or family member or nominated by a state or territory government.
Securing an Australian Visa for Canadians
Assess Your Eligibility
Your first step is to determine which visa fits your circumstances best. Assess your skills, qualifications, and the purpose of your stay in Australia to identify the right visa subclass.
Gather Necessary Documentation
Once you’ve determined the visa you need, compile all the necessary documentation. This may include proof of qualifications, work experience, health insurance, and police checks.
Apply Online
Most visa applications can now be made online via the Australian Government’s Department of Home Affairs website. Ensure all information is accurate and that you include all required supporting documents to avoid delays.
Visa Processing
Processing times can vary depending on the visa type and the volume of applications received by the Department of Home Affairs. During this time, keep an eye on your application status and be prepared to provide additional information if requested.
Visa Approval
Upon approval, you’ll receive your visa grant number and the date your visa starts. Make sure to comply with all visa conditions and keep a copy of your visa grant notice.
Preparing for the Australian Workplace
Understanding the legal framework is vital, but it’s just as important to prepare for the cultural shift in the workplace.
Work Culture
Australian work culture might be more casual and laid back than you’re used to in Canada. However, this doesn’t mean that Australians do not work hard. It’s a balance, with a strong emphasis on work-life harmony.
Employee Rights and Obligations
Familiarize yourself with Australian labour laws. The Fair Work Ombudsman provides resources outlining your rights and obligations as an employee in Australia, including fair pay, work hours, and workplace safety.
Networking
Leverage social platforms like LinkedIn or local Canadian-Australian business associations to build your network and find job opportunities.
Settling In
Once you arrive, there are a few practicalities to take care of:
Tax File Number (TFN)
You’ll need to apply for a TFN for taxation purposes. Without it, you’ll be taxed at the highest rate.
Australian Bank Account
Open a local bank account to manage your finances efficiently. Some banks allow you to open an account from Canada up to three months before you arrive.
Accommodation
Consider short-term accommodation while you get your bearings. Research the housing market in your chosen city to find something more permanent.
Health Insurance
Depending on the visa, you might need to maintain health insurance coverage for the duration of your stay. Research Australian health insurance providers and select a suitable policy.
Legal Considerations
Abiding by Visa Conditions
Ensure you fully understand the conditions of your visa. Working longer than permitted or outside of the terms could lead to visa cancellation.
Taxation
Understand your tax obligations. Canada and Australia have a tax treaty to prevent double taxation. However, it’s wise to consult with a tax professional.
Legal Assistance
Consider consulting with an immigration lawyer or registered migration agent to assist with complex visa applications or issues that arise while in Australia.
Embrace the Australian Experience
Working in Australia can be a life-changing experience. By following this legal roadmap, you’ll be well-equipped to embrace the Australian lifestyle and work culture. Remember, securing an Australian visa for Canadians is your golden ticket to an incredible personal and professional journey Down Under. Prepare thoroughly, respect the local laws, and immerse yourself in all the adventures that await.
Features
Can Multi-Generational Trips Avoid Transit Burnout
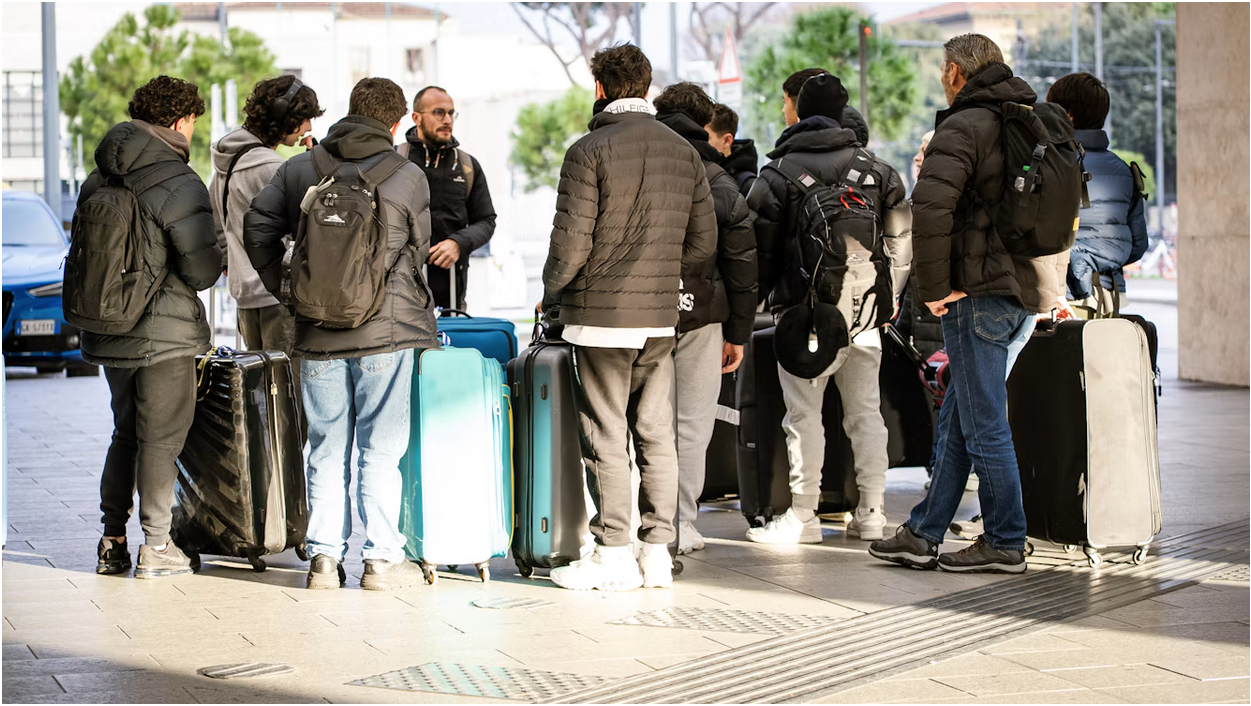
A multi-generational trip can bring children, parents and grandparents together, but frequent transfers can quickly drain the group’s energy. Long station walks, tightly timed connections and heavy bags often create more tension than the attractions themselves.
The best defence against transit burnout is a schedule shaped around the group’s real abilities. Families should discuss mobility, sleep routines and personal priorities before booking. Expectations need to be clear before everyone leaves home. Once those needs are visible, the itinerary can leave room for both shared experiences and individual breaks.
Pacing Itineraries for Varied Energy Levels
Start with one main activity each day, then treat everything else as optional. A museum visit at 10 a.m. followed by lunch and a free afternoon will usually work better than three timed attractions spread across a city. Younger children may need a nap, grandparents might welcome a quiet café and teenagers could want time to explore nearby shops.
Travel days deserve even less structure. If a train arrives at noon, avoid booking a guided tour for 1:30 p.m. Delays, station exits and the trip to the accommodation can easily consume that margin. Choose a flexible afternoon activity such as a public garden, waterfront walk or neighbourhood market. Anyone who feels tired can return early without causing the group to miss a reservation.
Build recovery periods into longer trips as well. After two busy sightseeing days, schedule a slower morning or a full day without tickets. The practical advice in this guide to a multi-generational road trip also supports involving the whole family in the planning process. Ask each traveller to name one priority and one activity they’re comfortable skipping.
A shared digital calendar can keep the plan visible, but a printed one-page schedule helps family members who prefer paper. Mark fixed bookings, walking times and rest periods clearly. When everyone knows which parts are flexible, a change feels like an expected adjustment instead of a disappointment.
Reducing Gear Hassles on Transfer Days
Pack so each adult can manage their own essential items without depending on the strongest person in the group. One wheeled case and one small day bag per traveller is a useful limit for many city trips. Children can carry a light backpack containing a sweater, snack and activity, though an adult should still have space to take it if needed.
Keep medicine, identification, chargers and one change of clothing in personal bags. Checked luggage, hotel rooms or vehicle compartments may not be available when those items are needed. A small packing cube for each family member also makes short stays easier because nobody has to unpack an entire case to find socks.
Temporary storage can solve the awkward gap between accommodation checkout and an evening departure. For example, families passing through central Edinburgh can reserve Edinburgh Waverley luggage storage through an online booking network. This allows travellers to spend their final hours visiting a nearby attraction or having lunch without pulling suitcases over uneven streets.
Assign transfer-day roles before leaving the hotel. One adult can hold tickets and confirm the platform, another can count bags and a third can stay with children or anyone who walks more slowly. Avoid changing those roles halfway through a crowded station unless necessary.
Before each transfer, check the route from the platform to the next transport connection. A ten-minute walk on a map may involve stairs, busy crossings or a large station concourse. That detail determines how much time the family actually needs.
Accessible Stops Near Major Attractions
Choose rest stops before anyone becomes exhausted. Look for cafés, libraries, public gardens and indoor seating within a short distance of the main attraction. A planned 30-minute break can prevent a rushed search for washrooms or chairs when someone is already uncomfortable.
Accessibility information should come directly from the attraction or local transit operator. Check for step-free entrances, elevators, accessible washrooms and seating inside exhibits. If a family member uses a mobility aid, call ahead to ask where taxis or accessible vehicles may drop passengers. Photos on mapping services can also reveal steep approaches and cobblestones that a standard route description may overlook.
Keep the group’s walking radius realistic. A kilometre may feel easy at home, yet it becomes harder after several hours in a gallery or while supervising young children. Consider a simple hub plan: visit one major site, eat within two blocks and select a nearby park or smaller attraction for the afternoon. This reduces repeated boarding, waiting and transfers.
Weather matters too. Heat, cold and rain can change a manageable route into a tiring one. Carry water and sun protection during warm months, then identify an indoor backup before leaving the accommodation. On wet days, pick attractions connected by a direct transit route and avoid schedules that require multiple changes.
Finally, agree on a regrouping point in case the party separates. Choose a specific entrance, ticket desk or café instead of saying “outside.” Give older children and adults a card containing the accommodation address and one family contact number.
Creating Meaningful Shared Memories Together
Shared memories often come from participation, not from covering the longest list of landmarks. Invite family members to take turns selecting a meal, photo stop or short activity. A grandparent might choose a historic neighbourhood, a child could pick an aquarium exhibit and an adult sibling may arrange a family portrait. That balance gives everyone some ownership of the trip.
Families also use shared travel to pass along stories and strengthen connections across generations. RBC Wealth Management’s discussion of multi-generational travel legacies highlights how experiences can support family bonds and shared values. You can bring that idea into an ordinary holiday by asking relatives about previous visits, childhood trips or family traditions connected to a place.
Keep memory-making simple. Ask one person each day to record three details: something funny, something unexpected and something the group learned. Children can collect ticket stubs or draw a favourite sight, while adults add captions to a shared photo album. Guidance on creating lasting travel memories also emphasizes the value of experiences that family members can remember together.
Allow smaller groups to split up without guilt. Two relatives may enjoy a long gallery visit while others rest at the accommodation. Everyone can reunite over dinner and exchange stories, giving the day a shared ending without demanding identical energy levels.
Before heading home, choose one photo together and ask each person to describe what happened around it. Years later, those details will matter more than the number of attractions checked off the schedule. A trip that leaves space for conversation, rest and unplanned discoveries has a much better chance of being remembered for the family time, not the tiring transfers.
Features
Why Teachers Are Exploring Sound Buttons for Classroom Activities

A single correct-answer chime can make a shy student sit up a little straighter. Teachers notice moments like that. Small sounds change how a room feels, and how a room feels shapes how students learn.
That is why more teachers are exploring sound buttons. One tap plays a drum roll before a quiz answer, applause for a finished project, or a ding to start a new task. The tools are free, quick to use, and fit almost any subject. They give teachers a fresh way to keep students curious and involved.
What Is Drawing Teachers to Sound Buttons?
Teachers are always looking for simple ways to keep students engaged. Many classroom tools take time to set up, need training, or cost money. Sound buttons avoid all three. A teacher can open a page, tap a sound, and see the whole class react.
Students also respond to sound almost instantly. A sudden drum roll grabs attention faster than a spoken reminder. A cheerful sound rewards effort without stopping the lesson. These quick reactions make sound buttons feel useful from day one.
Flexibility adds to the appeal. The same set of sounds works for a morning math quiz and an afternoon story. Teachers can match each sound to the activity’s mood.
How Do Sound Buttons Change the Feel of Classroom Activities?
Many classroom activities follow a familiar routine. Students answer, the teacher responds, and the lesson moves on. Adding sound breaks that pattern in a positive way. Used by teachers in a variety of classroom activities, SoundButtonsLab.com is a free soundboard offering sound buttons for classroom activities and sound effects for children’s pronunciation training. The site notes, “A simple sound can change how a whole class responds to an ordinary moment in the lesson.”
That change often shows up in student energy. A drum roll before an answer makes everyone lean in and wait. A cheer after a correct response turns one student’s win into a shared moment. Even quiet students tend to join in when the activity feels like a game.
Sound also adds structure. When each sound means something specific, students learn the routine quickly. A ding can mean start, and a chime can mean stop. That predictability helps lessons run smoothly with fewer reminders.
What Does Research Say About Game-Like Learning?
Adding game elements to lessons is more than a fun trick. A meta-analysis by Michael Sailer and Lisa Homner reviewed studies on gamification in learning. They found small but positive effects on students’ learning, motivation, and behavior.
Sound buttons bring several game elements into a classroom at once. They add suspense, instant feedback, and moments of celebration. A quiz with a drum roll and a correct-answer chime feels closer to a game show than a test. When students enjoy the format, they are more willing to practice and try again after mistakes.
Which Classroom Activities Work Best With Sound Buttons?
Sound buttons fit nearly any lesson, but some activities benefit the most. These four are easy places to start:
Quiz Games
Quizzes become exciting with a drum roll before each answer and a chime for correct ones. Teams can compete for points while the sounds keep energy high. Students often ask for review games once sounds become part of the routine. Keeping the wrong-answer sounds gentle so no one feels embarrassed.
Reading and Pronunciation Practice
Teachers can record words or sounds on buttons for students to hear again and again. Kids tap, listen, and repeat until the pronunciation feels natural. Hearing the same clear model every time helps them notice small differences. A cheering sound rewards each new word they master.
Transitions and Routines
Moving between activities can waste valuable class time. A short ding can signal clean-up time, and another sound can mark the start of a new task. Students learn these cues quickly and respond without repeated instructions. Smooth transitions leave more time for learning.
Celebrations and Rewards
Applause or kids cheering can mark a finished project or a goal reached. These sounds make effort feel noticed and valued. Save big celebrations for real milestones, so they keep their meaning. A small reward sound can still mark everyday wins.

How Do Sound Buttons Help Different Kinds of Learners?
Every class includes students with different strengths and comfort levels. Some speak up easily, while others hold back. Sound buttons give quieter students a low-pressure way to join in.
Engagement matters for every learner. A review by Jennifer Fredricks, Phyllis Blumenfeld, and Alison Paris described engagement as behavioral, emotional, and cognitive. Students who feel involved are more likely to stay focused and keep trying. Sound buttons touch all three areas. Students act on cues, enjoy each sound, and think ahead to the next question.
How Can Teachers Get Started Without Overdoing It?
Start small. One or two sounds used well beat a dozen used randomly. Try these simple steps:
- Pick one sound for attention and one for celebration.
- Explain what each sound means before using it.
- Preview every sound to make sure it fits the age group.
- Keep the volume comfortable for the whole room.
Once students know the routine, add new sounds slowly. Let students suggest favorites now and then to keep things fresh. A thoughtful start keeps sound buttons fun for months instead of days.
Features
Every Rick Owens Sneaker You Should Know: A Complete Ranking
I’ve spent an embarrassing amount of time thinking about Rick Owens sneakers. Comparing soles in browser tabs at 2 AM, reading forum debates about leather quality across seasons. But it’s turned me into the person friends text when they want to know which pair to buy first — so at least it’s a useful obsession.
The thing about Rick Owens eu clothing is that sneakers are secretly the gateway. People see the draped jackets on the runway and assume that’s where Rick starts. For most of us, it starts with a pair of shoes that looked unlike anything else on the shelf. Here’s my ranking of every major silhouette.
Ramones: The Gateway That Started It All
If Rick Owens sneakers have a mascot, it’s the Ramones. Named after the punk band — these are Rick’s take on the classic high-top. Chunky rubber sole, waxed cotton laces, a toe cap that sits more forward than a typical Converse shape. The most recognizable silhouette in the entire lineup.
I recommend these as a first purchase to everyone. Easiest to style, most forgiving in proportion, and they age beautifully. Mainline leather runs $700–900. DRKSHDW canvas sits closer to $400–500 and works just as well daily.
Geobaskets: The Statement Maker
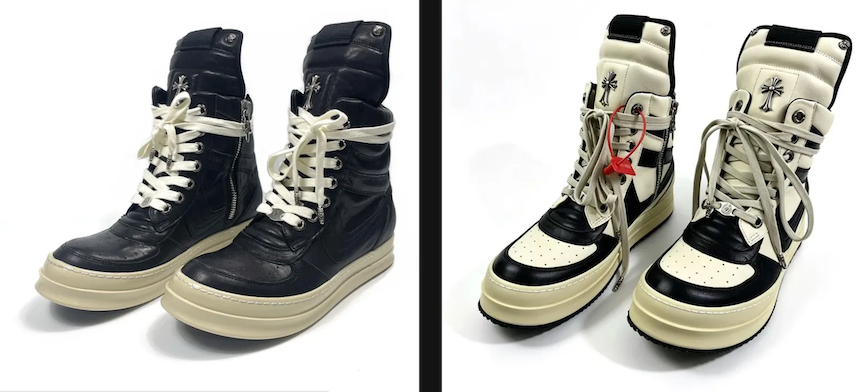
Take the Ramones, crank the volume up, and you get Geobaskets. Higher shaft, thicker sole, more visual weight. The proportions are deliberately aggressive — they look like they belong in a sci-fi film, and that’s the point.
Geobaskets are not a beginner shoe. The shaft height changes how your pants sit. They demand confidence. But if you’ve already got a couple of pieces from the Rick Owens collection and want to commit harder — this is the move. Leather pairs run $1,000+ and they’re worth it to the right person.
Abstract: The Low-Top That Actually Works
Rick’s low-top game was uneven until the Abstracts landed. These take the Ramones DNA — the sole shape, the toe box — and drop it to ankle height. Clean, sharp, unexpectedly versatile. I wear mine with cropped trousers in summer and they look as intentional as any designer shoe I own.
The Abstract solved a real problem: what do you wear when it’s too hot for Geobaskets but you still want that Rick silhouette? This. Browse the EU store during warmer months and you’ll see these sell fast.
Megalaced Runner: Where Rick Meets Athletic
When Rick started putting out runner-style sneakers, purists lost their minds. But the Megalaced Runner works because it doesn’t pretend to be a performance shoe. It takes the runner shape and twists it — exaggerated sole, dramatic lacing, materials that belong on a runway, not a track. The pick for someone who lives in sneakers but wants to graduate beyond Nike into something with more design weight.
Fogachine: The Platform Statement
The Fogachine is for people who’ve seen every other Rick sneaker and thought — “not enough.” The stacked platform sole is massive, borderline architectural. Closer to wearable sculpture than traditional footwear. I’ve tried them on and they’re surprisingly comfortable, but they require a very specific wardrobe commitment. If your closet is already deep into Rick Owens, they’re a natural endpoint.
Sizing and Mainline vs DRKSHDW
Rick Owens sneakers run about a full size large. A US 10 in Nike translates to roughly a 43 in Rick, maybe 42 depending on the model. Ramones and Geobaskets are the most generous. If you’re ordering from the official Rick Owens EU site, their size charts are reliable.
Every model comes in two tiers. Mainline is premium leather, made in Italy. DRKSHDW is the diffusion line — canvas, waxed cotton, denim — same silhouette, roughly half the cost. What nobody tells beginners: DRKSHDW is not a downgrade. Canvas Ramones develop a worn-in character that leather doesn’t replicate. If you shop Rick Owens online and see DRKSHDW — you’re not settling, you’re choosing.
Which One Should You Buy First?
Ramones. Always Ramones. DRKSHDW to start smart, mainline leather to start with a grail. Every other model builds on what the Ramones established. Once you own a pair, everything else in the Rick Owens EU clothing catalog makes more sense.
After that, the path is personal. Geobaskets for drama. Abstracts for warm weather. Megalaced Runners if you live in sneakers. Fogachines if you want to tower. Once you put on your first pair, regular sneakers start looking flat — that’s what twenty years of perfecting a sole shape does.